


/https%3A%2F%2Fprofilepics.canalblog.com%2Fprofilepics%2F5%2F0%2F506523.jpg)
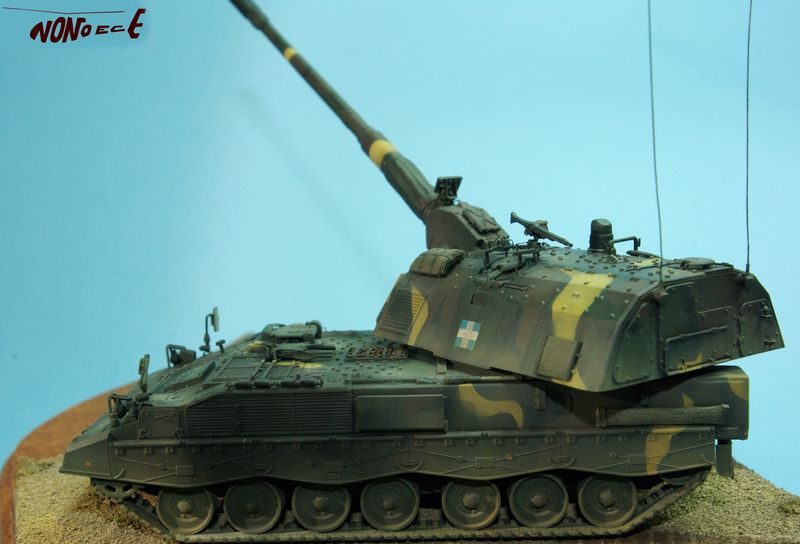
PZH2000 - Greek Army- Revell 1/72

Pzh 2000 - GREEK army - 2009 training exercice
Greek Army bought 24 x Pzh2000 which were delivered between 2003/2004. Here is my point of view of one of them.
Revell 1/72 kit is a pretty good model kit of this 155mmm self-propelled gun.
Model in the box is a very well-done plastic kit, but it needs some correction to represent a greek sample, as only german colors are proposed here. So, you will find in this building some little change I decide to have in order to make a greek model.
As usual, I use only plastic sheet, metal cover form wine bottle, electrical wire cable and tube to give fineness.


PICTURES : Click on photo to enlarge


BUILDING
Sorry Chaps, but It's an english spoken translation in order to train myself, please you to give me proofreading when necessary.
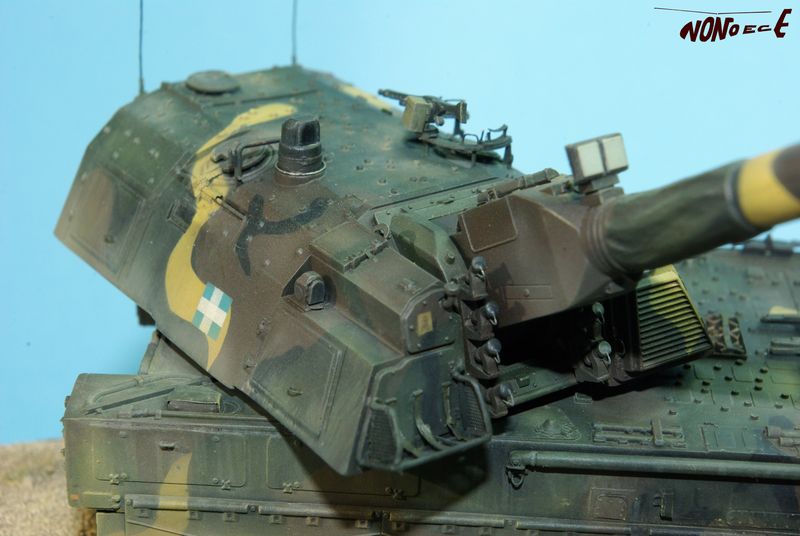
Step1 / Turret.
Large turret with 155mm ordnance give a strong view for this Pzh, so it needs some detailing work to approach reality with 1/72 scale .

Main work concerns little parts: We add a folded flexible cover on left side roof, a square identity plate on left side (greek modification), and some handful/bolt on other side and rear. Visor sight are detailed, and the circular support for defensive gun over one hatch is detailed with tube leg and I cut metal parts in a bottle cover . Rear side receives a new support for light with a fine plastic part. Hatches close system on each side are made with metal sheet and tube in conformity with real one. Smoke tube receive chain and are separated with an angle of launch axe of 15° each.
![]()
![]()
![]()


Futhermore, an attractive basket is built with a photo-etched grid (cut in a old one Trimaster grid), and electrical wire is need for building his support. Finally, it gives fineness instead of the big revell full plastic basket. Three straps cut in metal foil paper complete it and give an aerial impression when this baket is unload.


Then , ordnance is well detailed as we add two corrected better parts (in white here) on top of this155mm gun, and 2xhandfull. A flexible cover is made with putty (green Duro) on biggest part of the weapon as in reality in order to protect it from dust. But muzzle brake and fume extractor aren't corrected, and we will use only black oil paint to figure original holes.


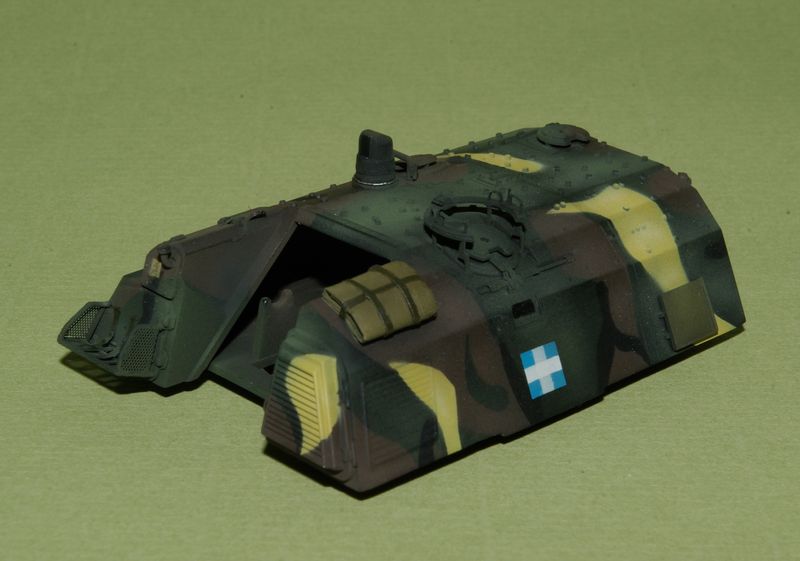
Step 2 / Chassis
Vertical chassis part doesn't need extensive modification; Meanwhile, some added support aren't fixed at same place on Greek model than on german one . So, we move it too.
We don't need to adjust revell parts with a lot of glue, but I use some putty due to a mistake when assembling rear part.


Let begin with sides and rear. A small work, mooving some support part, and fit out some others otherwhere.
We put some steel plate where parts are mooved as in reality in accordance with Greek photos. This version is lightly different from German one, but I don't know why they change it. Duro putty is used for covering one of this support on left side, a smal piece is put on right side . On rear of the chassis, details are done with steel tube and mosquito net, and with steel plate: a runningboard for climbing, a vertical folded cover with its support, a steel plate (hiding reloading system in real world) with an handfull below the two doors.


Slope glacis plate needs to be detailed too, specially lights protection and mirrors.
Some handfull are represented too, and main work is with the box filled of spare tracks part in the middle of the glacis. I forget to cut it before building, but it's not so difficult working like this.


Mirrors (plastic , wire cable and tube) aren't fit with glue for the moment in order to prevent them from breaking when I use airbrush. Photos show them folded when Pzh is firng, like in Afghanistan, but Greek army fires only on exercise. And all photos of greek models show them in service. So, we put them upright, it gives fineness too.
Lights are empty now ,and they will be fit with crystal clear at final step. A rod with a cable and a support for antenna on left side are added on the slope. Windows for pilot are covered with a small sheet of plastic. Handfull are made on the two hooks in front.
The arm that maintains gun when unused is showed folded: Gun will be leveled up as in service. Problem is that we need to make details for folding mecanism. A plate protects it in greek army.
Additionaly, looking at my model just before using paint, I decide to detail more some pieces: On one hand, front lights are detailed with a round wire cable on the main face in order to fill it easier with crystal clear, and on the other hand, rear lights are put in a squarre box of folded steel as showed on this photo and real world. Moreover, protections for mud on the front are correctly adjusted with sides. It seems that I fix them uncorrectly so I use plastic card

I expect I don't forget anything else. Defense gun on turret will be fit at end , like the main cable for tractor on rear.
Step3 / Painting
Greek Pzh wears four colors : Green and Brown, and Black and Yellow.
First , I begin with an overall Black, in order to fill all litlles holes around small pieces with a black color. It creates a well-done shadow effect, even when we put an other light layer of color with airbrush. In that case, it's the main color, green.
Second, Here we see Green color with smalls spots of initial black masked with tape: Side with his mask is over painted due to an error of masking. Shadow effect isn't very easy to observe with flash camera.


Third, Brown color. I choose a light one, because I will add darkness when weathering it with oil and oil paint juce. And also because I try to be in accordance with 72 scale (first time for me, finally convinced by readings): We will see at the end! For the moment, here it is. You can see a black spot added on glacis:


Four, Yellow. It's the easiest camouflage to paint, so we do it promptly. Then we begin by aging colors of this camo: I airbrush light clear green and light clear brown on center part of green and brown. We only add a few white mixed with initial color. Tracks are coming back black too. Working like this, we are approaching on final, photos seems to confirm that; however, we have to paint each detail which needs colors (bags, lights, visor, wire cable....).


Five, details need to be accurate, so they need to be paint finely. Turret receives my attention: visor, blue&white greek cross, windows, square icon of Maria. And slope effect is made with light "smoke" Tam color airbrushed on upper part each facet, in order to create shadow illusion.


Colors seem too lighters than original ones are, and I'm agree with this idea, but these three colors will be darkned when using oil without applying Matt or Gloss coat before.
Details are painted on chassis as fine as on turret. And antennas are made with wire cable.
Step 4/ Weathering ! the step I prefer...
We begin with oil and juce. First dark brown, second fresh mud, third light yellow "jaune de Naples".
Then we brush all details with clear mud, or a color like "cream".
And finally, we add powder from pastel. Here is a sort of "flesh" color, or " loud " yellow in other place.
Here it is...


Bye-Bye les amis ...et le prochain sera en français plutôt qu'en franglais!!
PHOTOS of original greek Pzh are here
And for your pleasure, Pzh in action with Vidéos


/https%3A%2F%2Fstorage.canalblog.com%2F75%2F18%2F657727%2F131049041_o.jpg)
/https%3A%2F%2Fstorage.canalblog.com%2F77%2F10%2F657727%2F131048963_o.jpg)
/https%3A%2F%2Fstorage.canalblog.com%2F22%2F89%2F657727%2F130028042_o.jpeg)
/https%3A%2F%2Fstorage.canalblog.com%2F96%2F80%2F657727%2F113382223_o.jpg)